If you’ve come across this page looking for a way to create a password protected, secure, hidden or locked folder in Windows XP for free, you’ve come to the right place. Unfortunately, Windows XP does not have any user-friendly built-in tools to create secure folders on computers with multiple users. Of course, you can encrypt data on your hard disk, but this only helps if your computer is stolen. In a previous post, I wrote about how you can hide a folder in Windows XP using a rudimentary built-in feature. This method is useful if you want to hide a folder or file and you’re pretty sure that anyone who is using the computer will have no idea how to un-hide the data. If you’re dealing with someone a little more computer savvy, there is another way to create a secure locked folder without having to buy any 3rd party software. This only works on Windows XP, not in Windows 7 or Windows 8. It basically involves using a script to morph the folder into something completely different so that it’s still visible, but nothing inside the folder is accessible. In order to view the data, you have to run another script to morph it back. Anyone who clicks on the folder will be brought to the Control Panel and simply think it is a shortcut. The other neat thing about this little trick is that any of the files or folders inside the hidden folder will not show up when you perform a search in Explorer. Note: Before you try this on some really important sensitive data, you should make sure you create a test folder with some fake test data to ensure you get it working properly. Since we’re messing with the internals of the folder, it could cause data loss if not done properly. Here are the steps to create the protected folder in Windows XP:
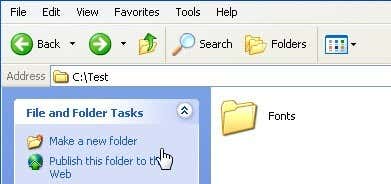
First create a folder that you will use to store your confidential data. For example, I have created a folder called Fonts at the root of my D drive. Since the hidden folder will bring you to the Control Panel, it’s best to name the folder as one of the programs inside there.
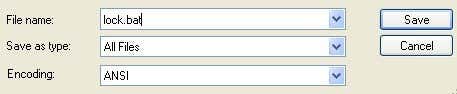
In the same location where you created the new folder, create a new file in Notepad, copy the following below into it, replace Fonts with the name of your folder and save it as lock.bat.
ren Fonts Fonts.{21EC2020-3AEA-1069-A2DD-08002B30309D}
To save the file as a .bat file in Notepad, just put the whole thing in quotes, like “lock.bat” and then click Save.
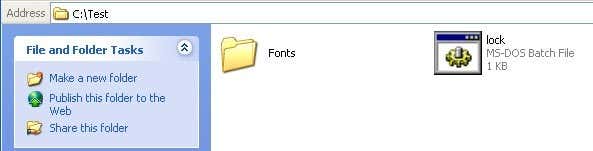
Now you should have a bat file named lock in the same directory as your Fonts folder, not inside the Fonts folder.
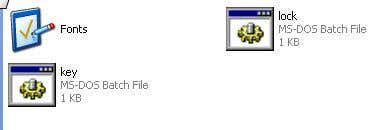
Create another NotePad file and type in the following listed below and save it as key.bat.
ren Fonts.{21EC2020-3AEA-1069-A2DD-08002B30309D} Fonts
Now you’ll have lock.bat and key.bat along with your folder. Go ahead and double-click on lock.bat and your folder will turn into the Control Panel and nothing inside can be viewed. Clicking on it will simply bring you to the Control Panel. You’ll notice the icon should have changed also.
To view the data inside your folder again, click on key.bat and your folder will return to normal! Pretty simple!
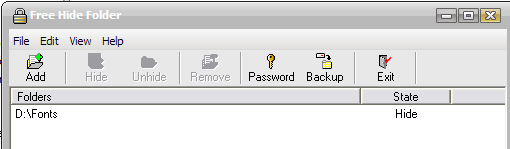
Of course, keeping the key.bat file in the same folder will defeat the purpose of securing the folder, so it’s best to move the key.bat file somewhere else, or even better, put it on a USB stick or CD that only you can access. Most people will be probably look at the folder and simply ignore it since it has the control panel icon and it links directly there. Of course, if someone knows this trick also, they can create their own key.bat file, etc and open it back up. However, if you’re dealing with someone who can do all of that, it’s best you check out more advanced 3rd party software to lock down a folder. ALTERNATIVE METHOD: If you’re having trouble with the above-mentioned method (from what I can see from the comments, a good number of people are), then here’s another quick and free way to create a secure folder in Windows XP. There is a very nice program called Free Hide Folder from Cleanersoft that allows you to easily hide your private folders. Your folders are completely hidden and you must supply a password to open the program to unhide the folders. The personal edition is free, just click the Skip Registration button unless you’re using it for commercial purposes.
I’ve tried this program myself and I cannot access the hidden folder via Windows Explorer nor the command prompt. So if the above method is not working, give this a shot! Any questions, post a comment. Enjoy!